
BAVS DNS Server
Meet the Functions
Know the right way
Procure you security.
Local DNS settings on the router
To set the DNS server BAVS into your router or your Fritz! Box, so you can enjoy the BAVS protection to all devices on the network.
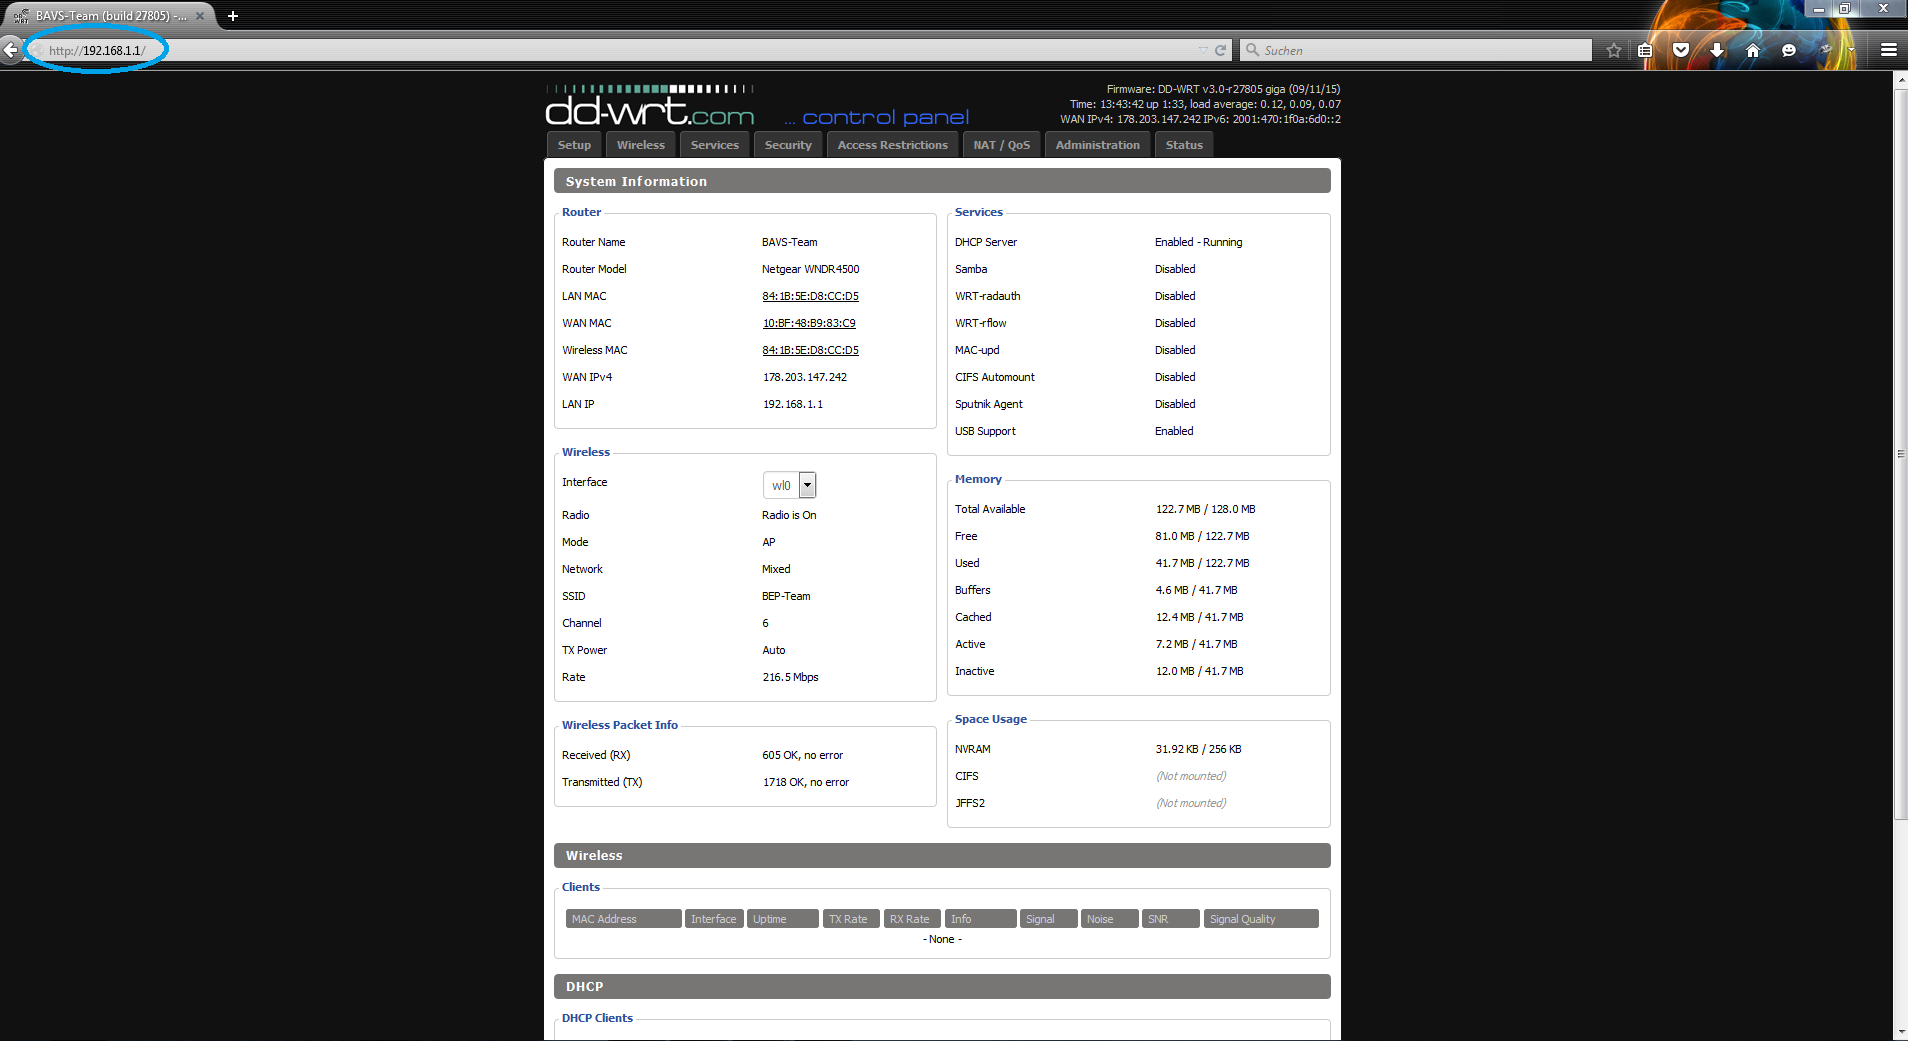
1) Open the router interface
Enter the following link into your Internet browser to move to the admin interface of your router:: http://192.168.1.1/
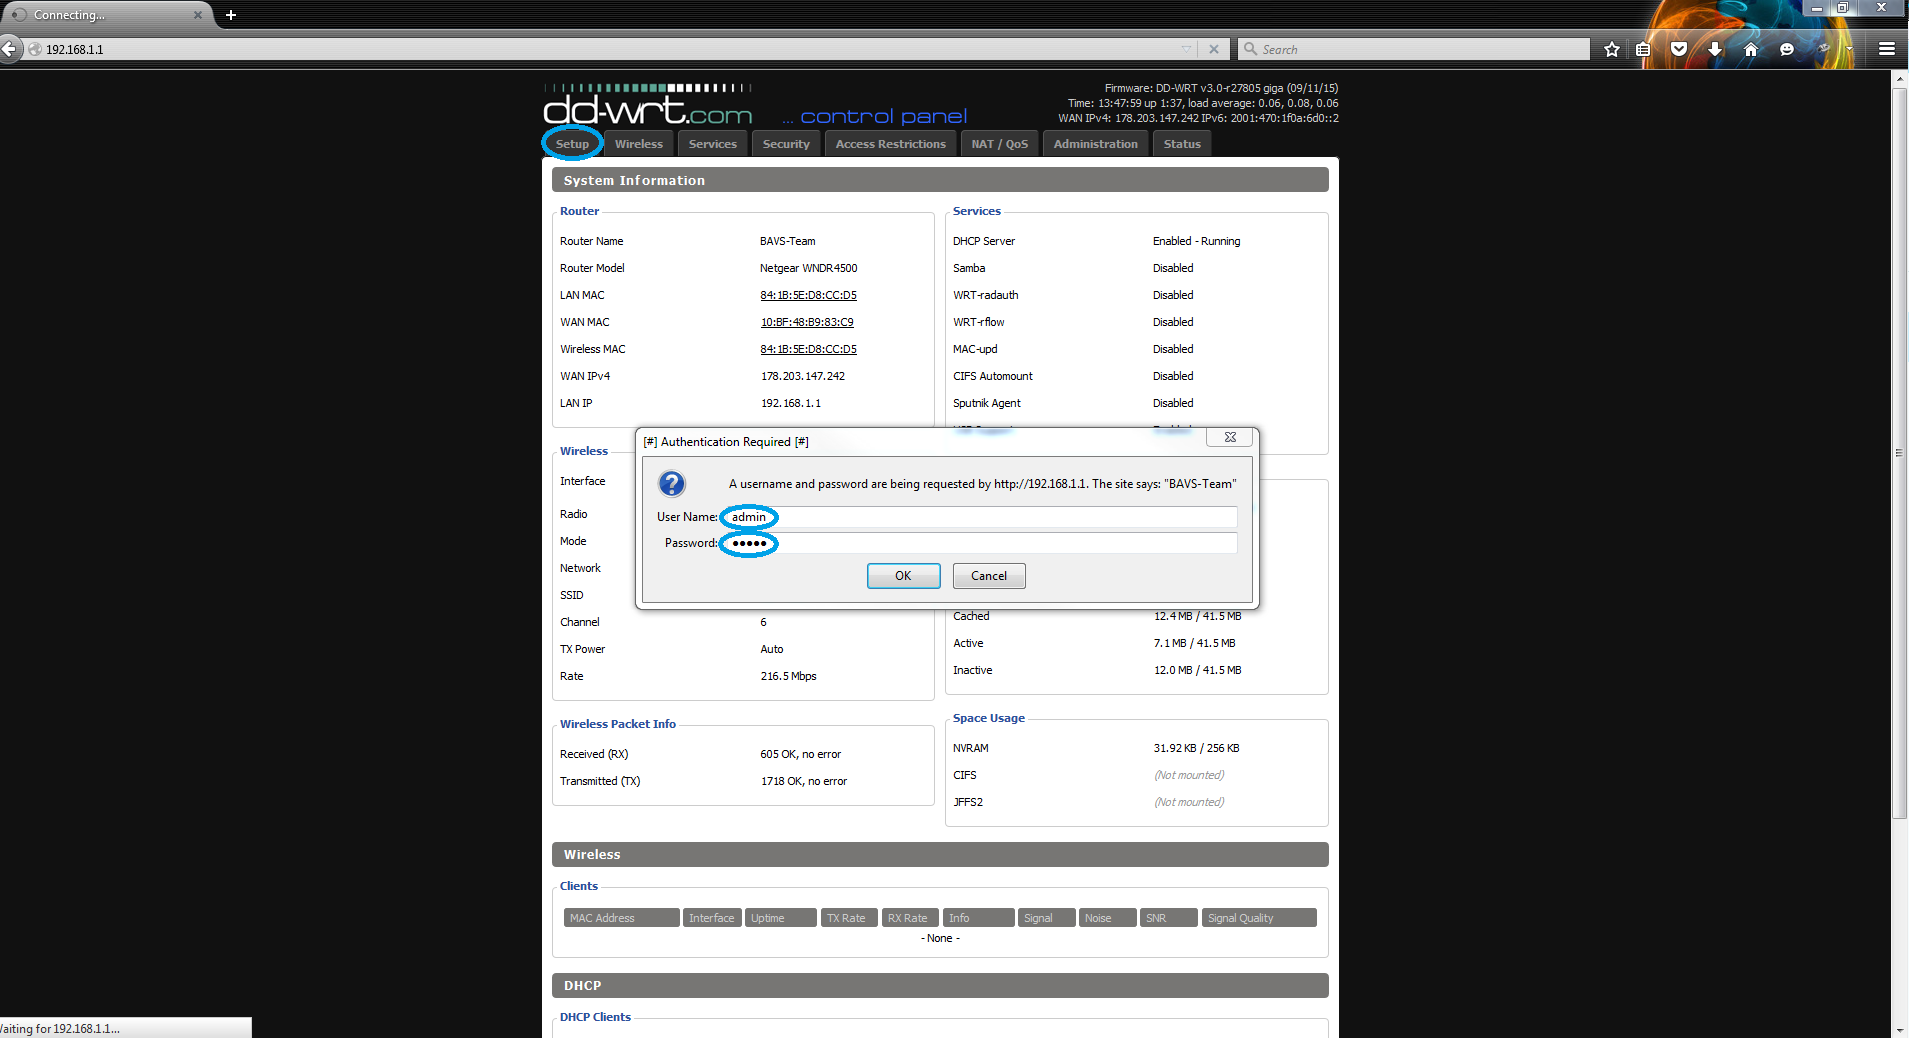
2) Router Admin Login
Click Setup to return to the basic settings. You will be asked for the router login data, you need to confirm this now.
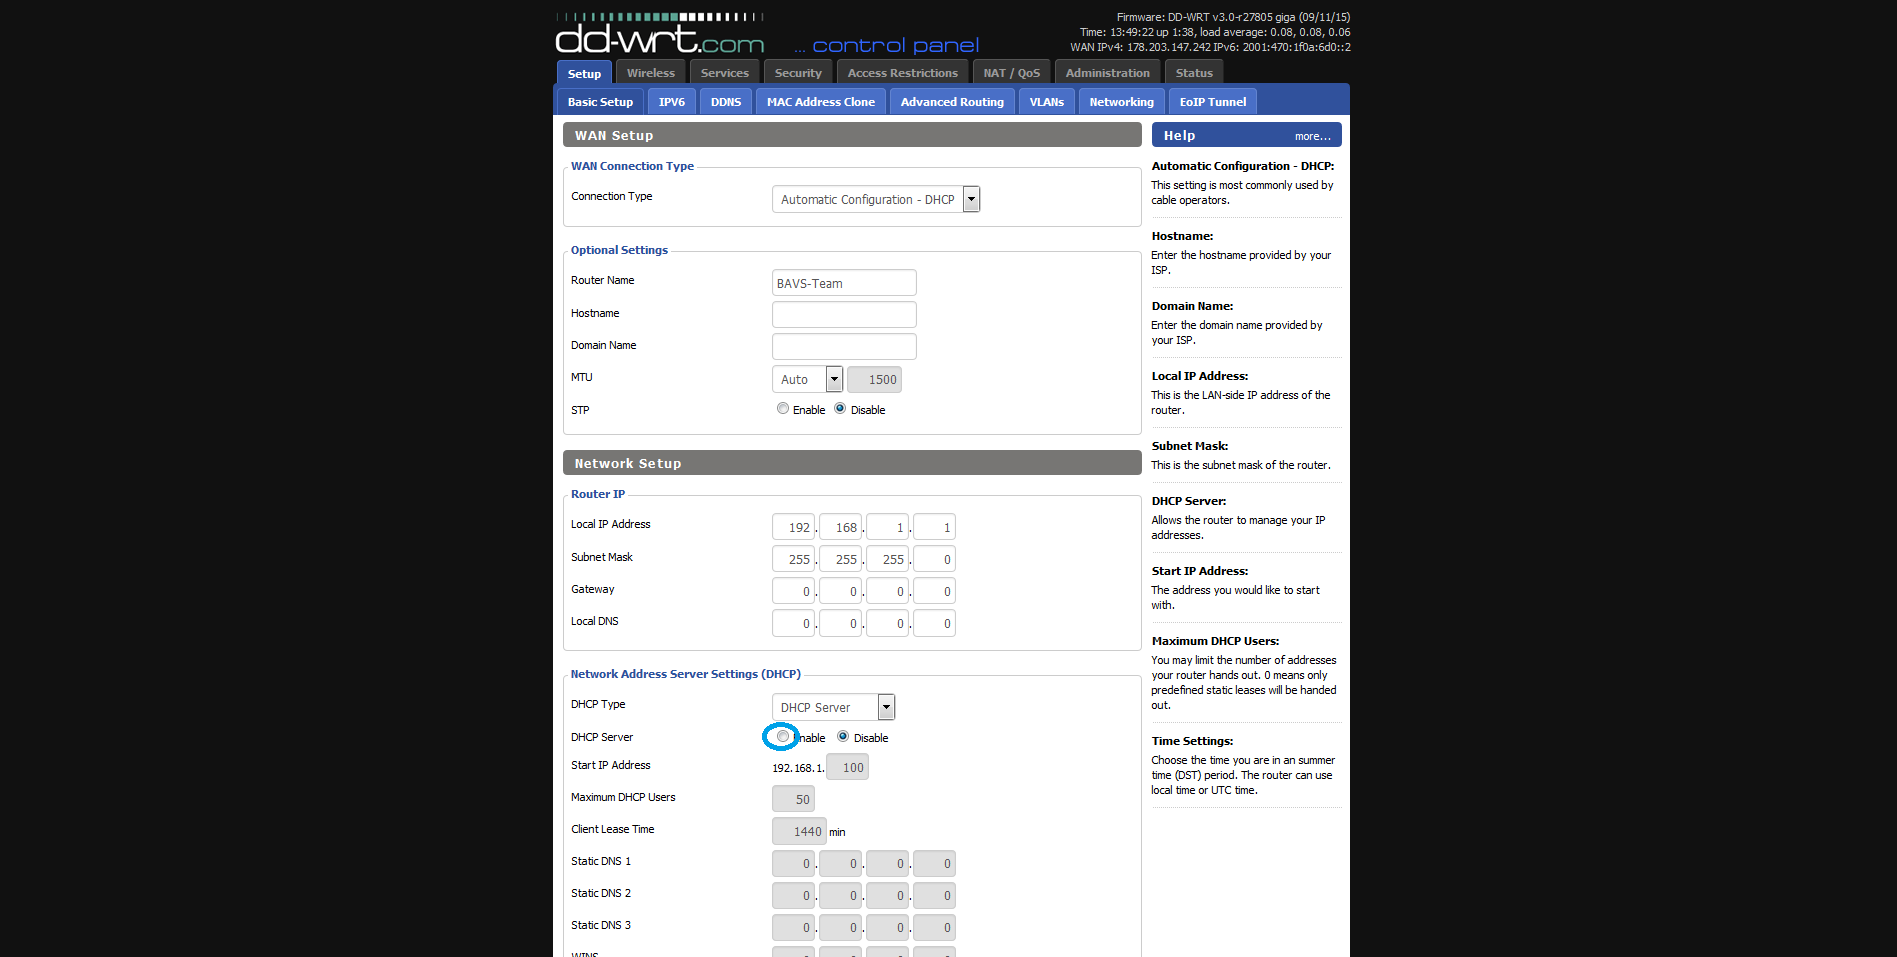
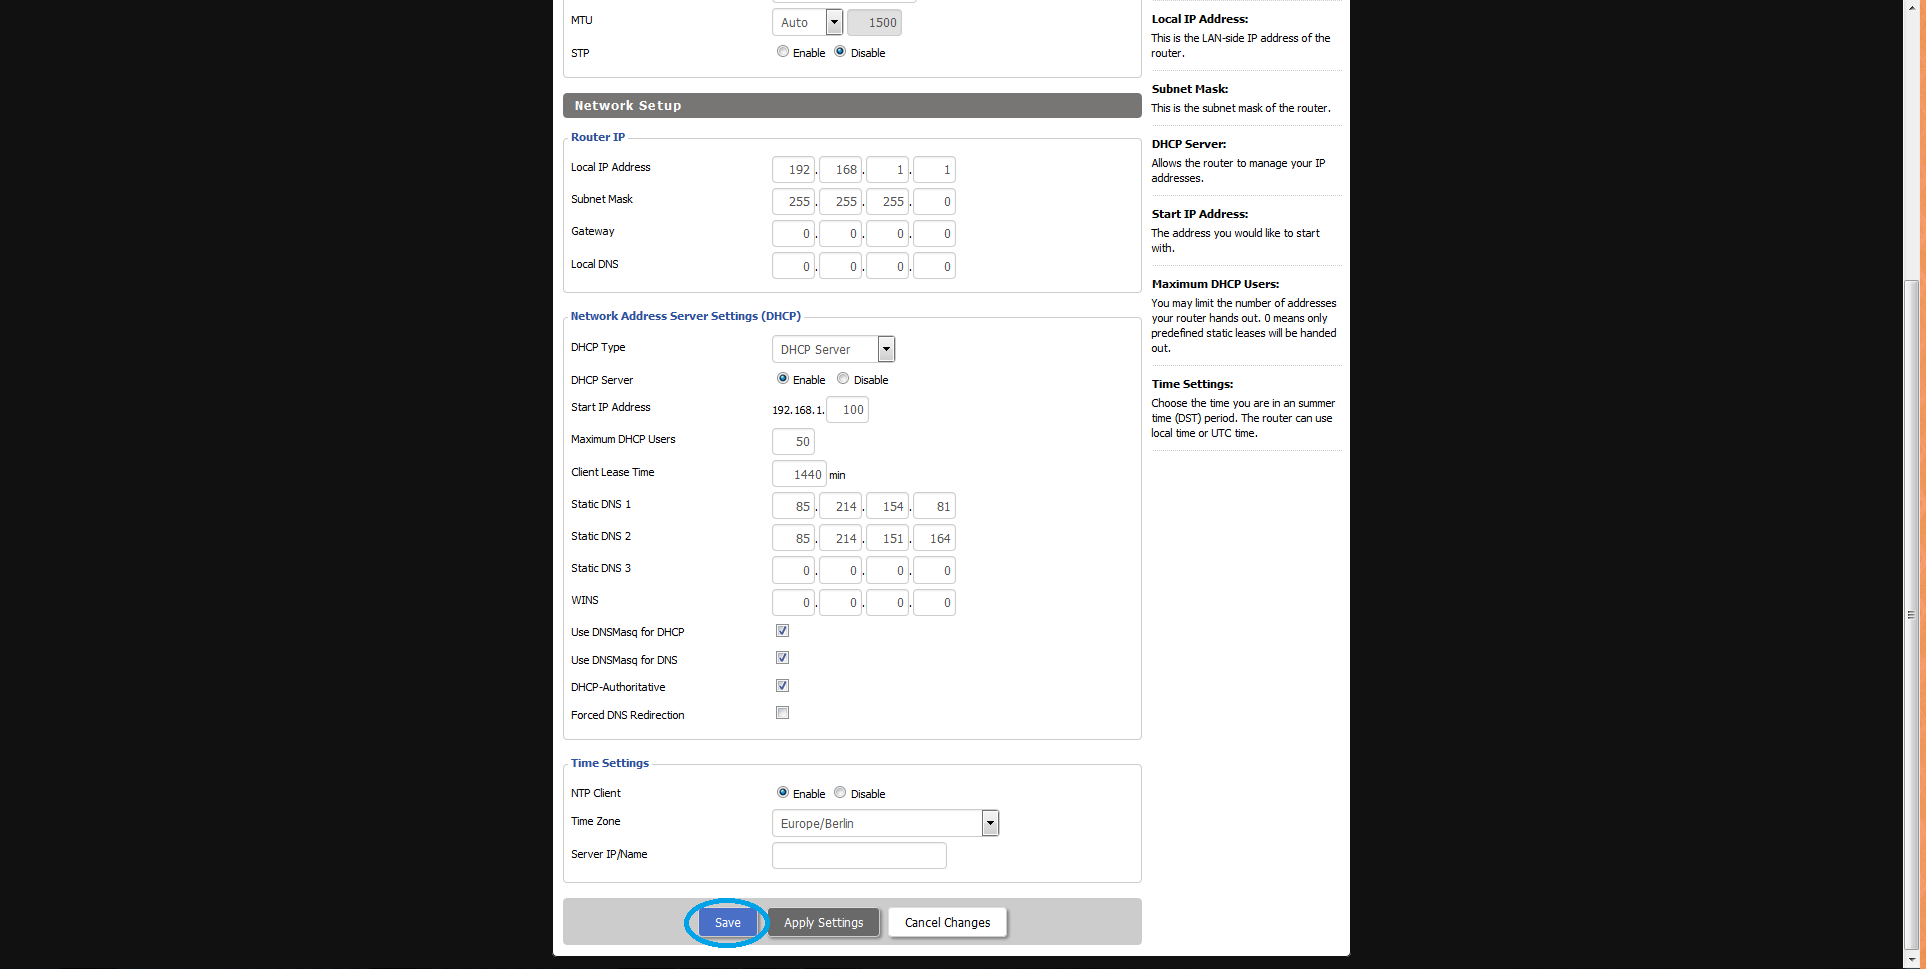
3) Enable DHCP
Now scroll down a bit until you arrived at the DHCP settings. Now switch on the DHCP service of the router.
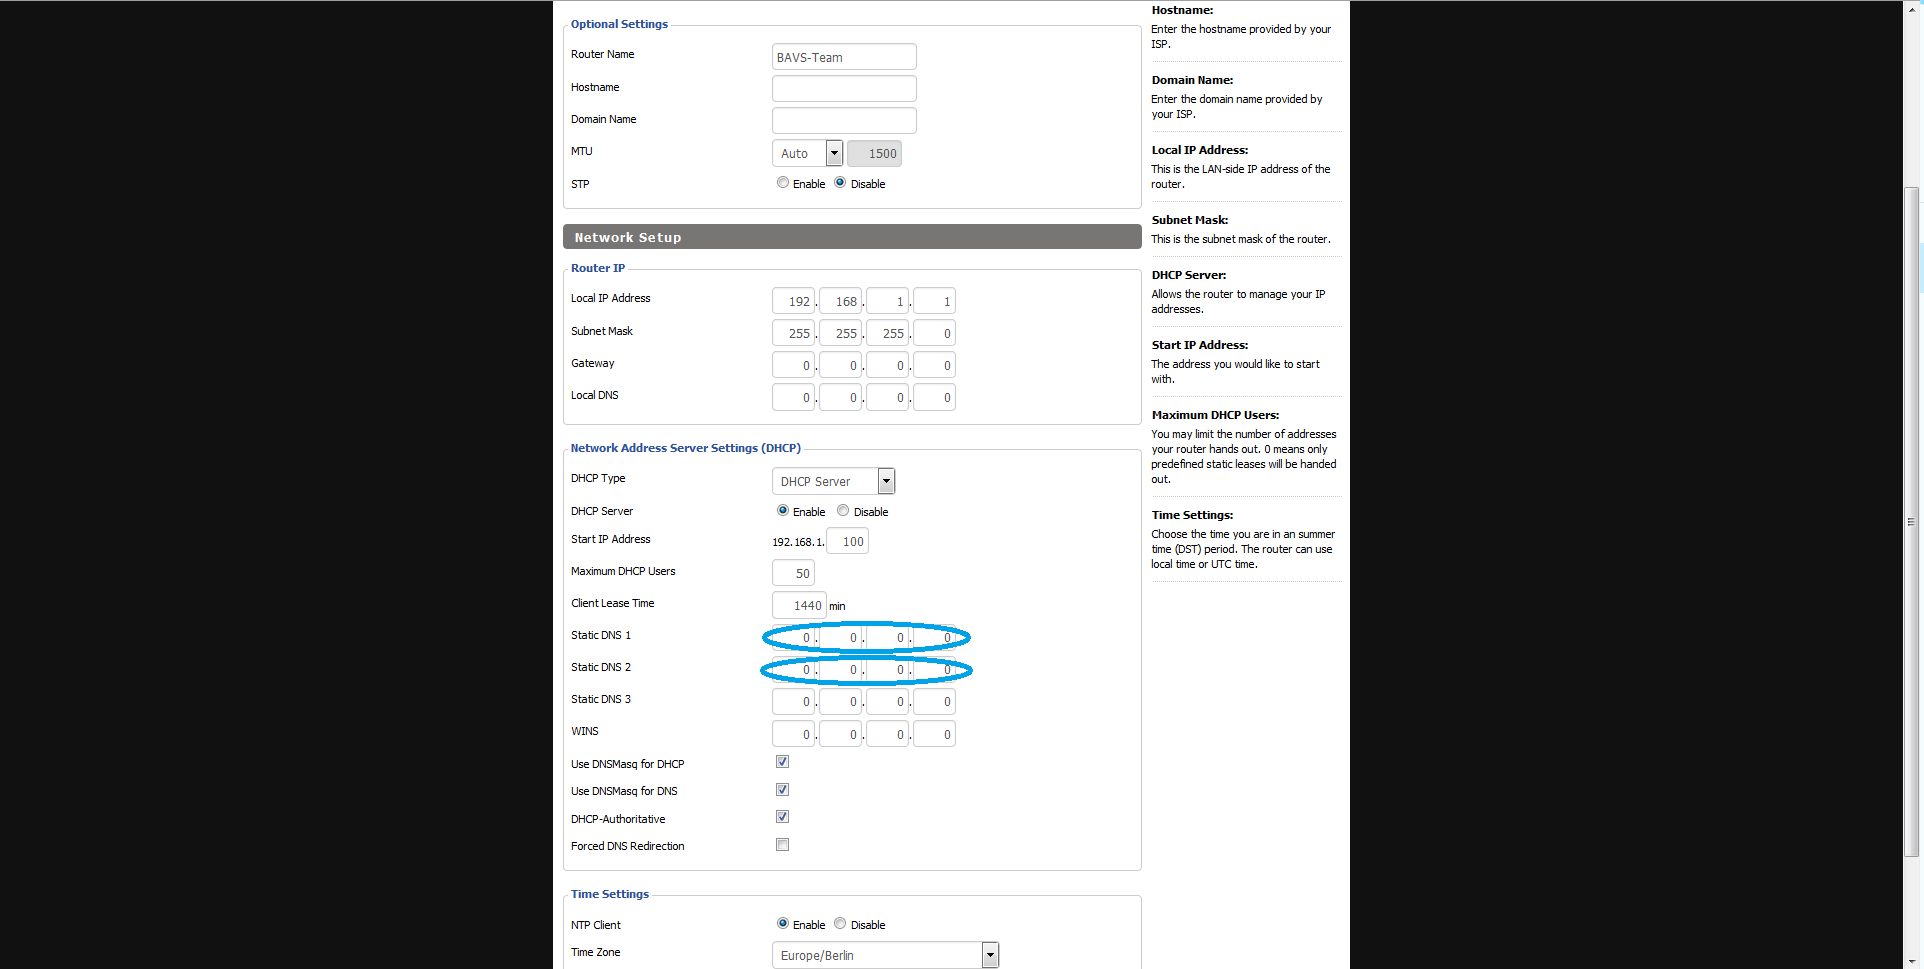
4) Set DNS Server
Now you must configure the DNS server BAVS. Wear for the IP 85.214.154.81 in the "static DNS 1" and the IP 85,214,151,164 in the "static DNS 2".
5) Save Settings
To save all settings, scroll a little further down and click the "Save" button.
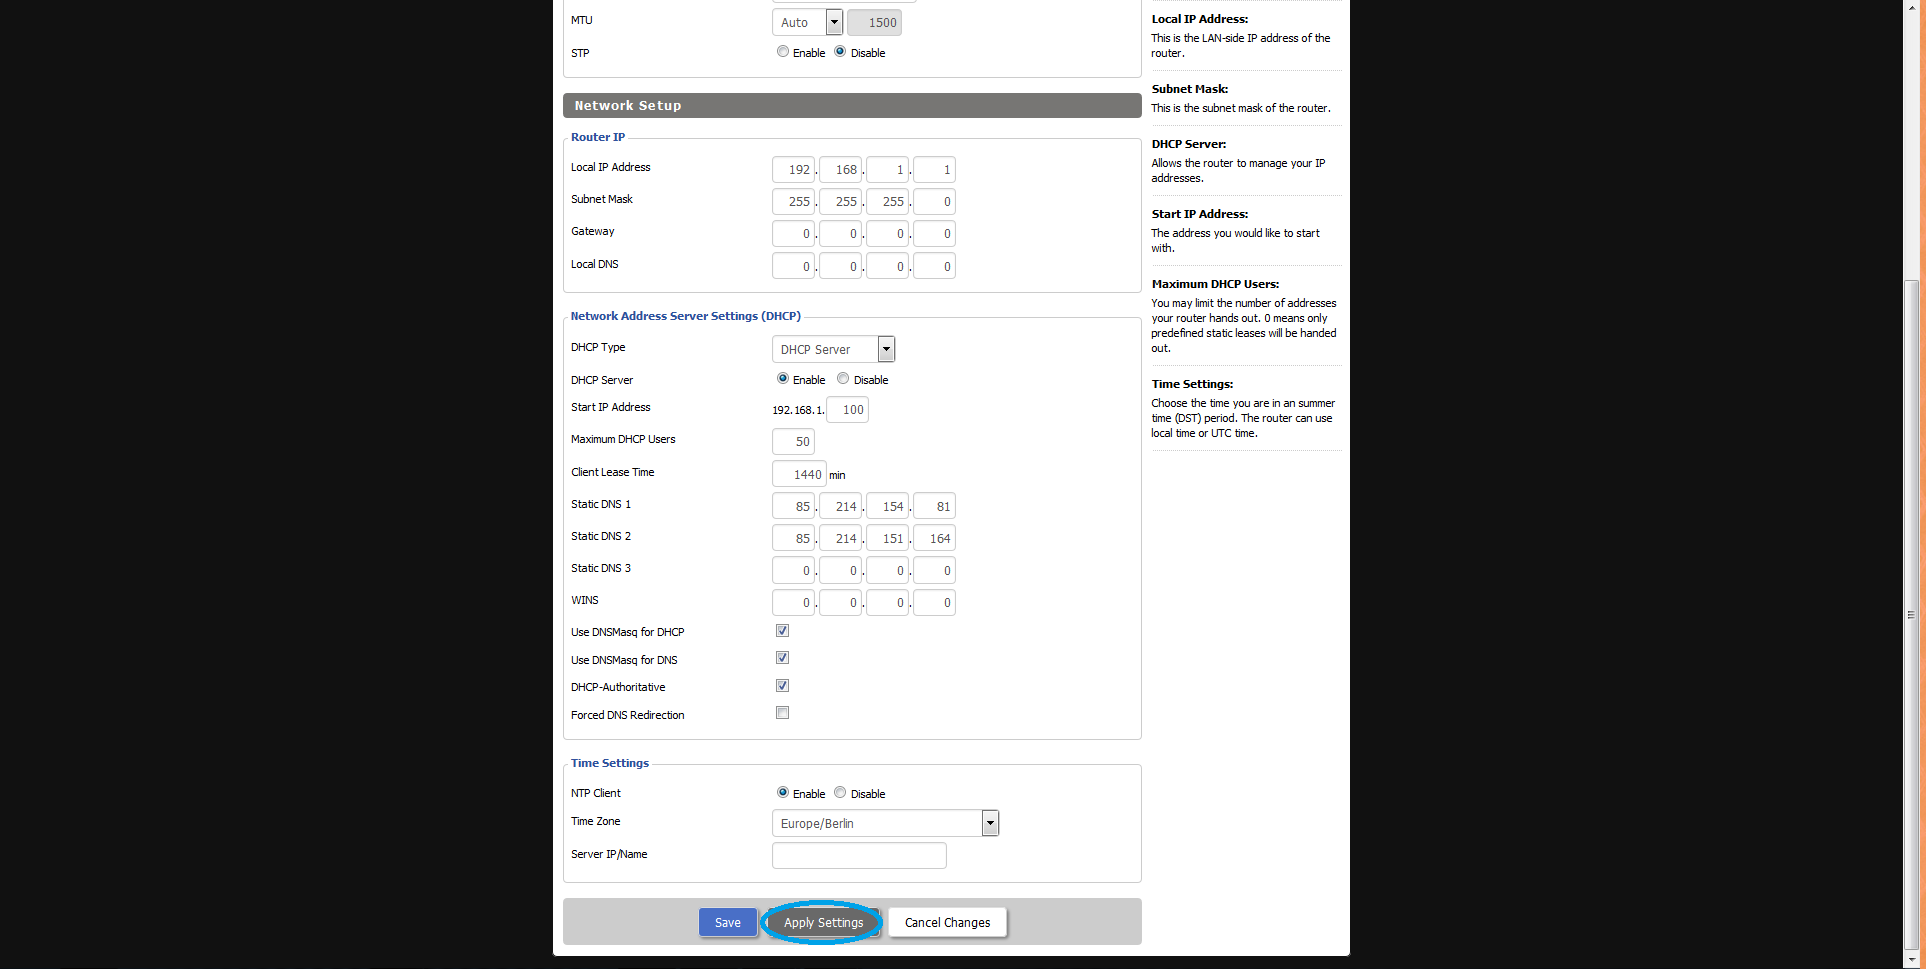
6) Apply settings
Thus, the new configurations take effect, you must now click the "Apply" button.